

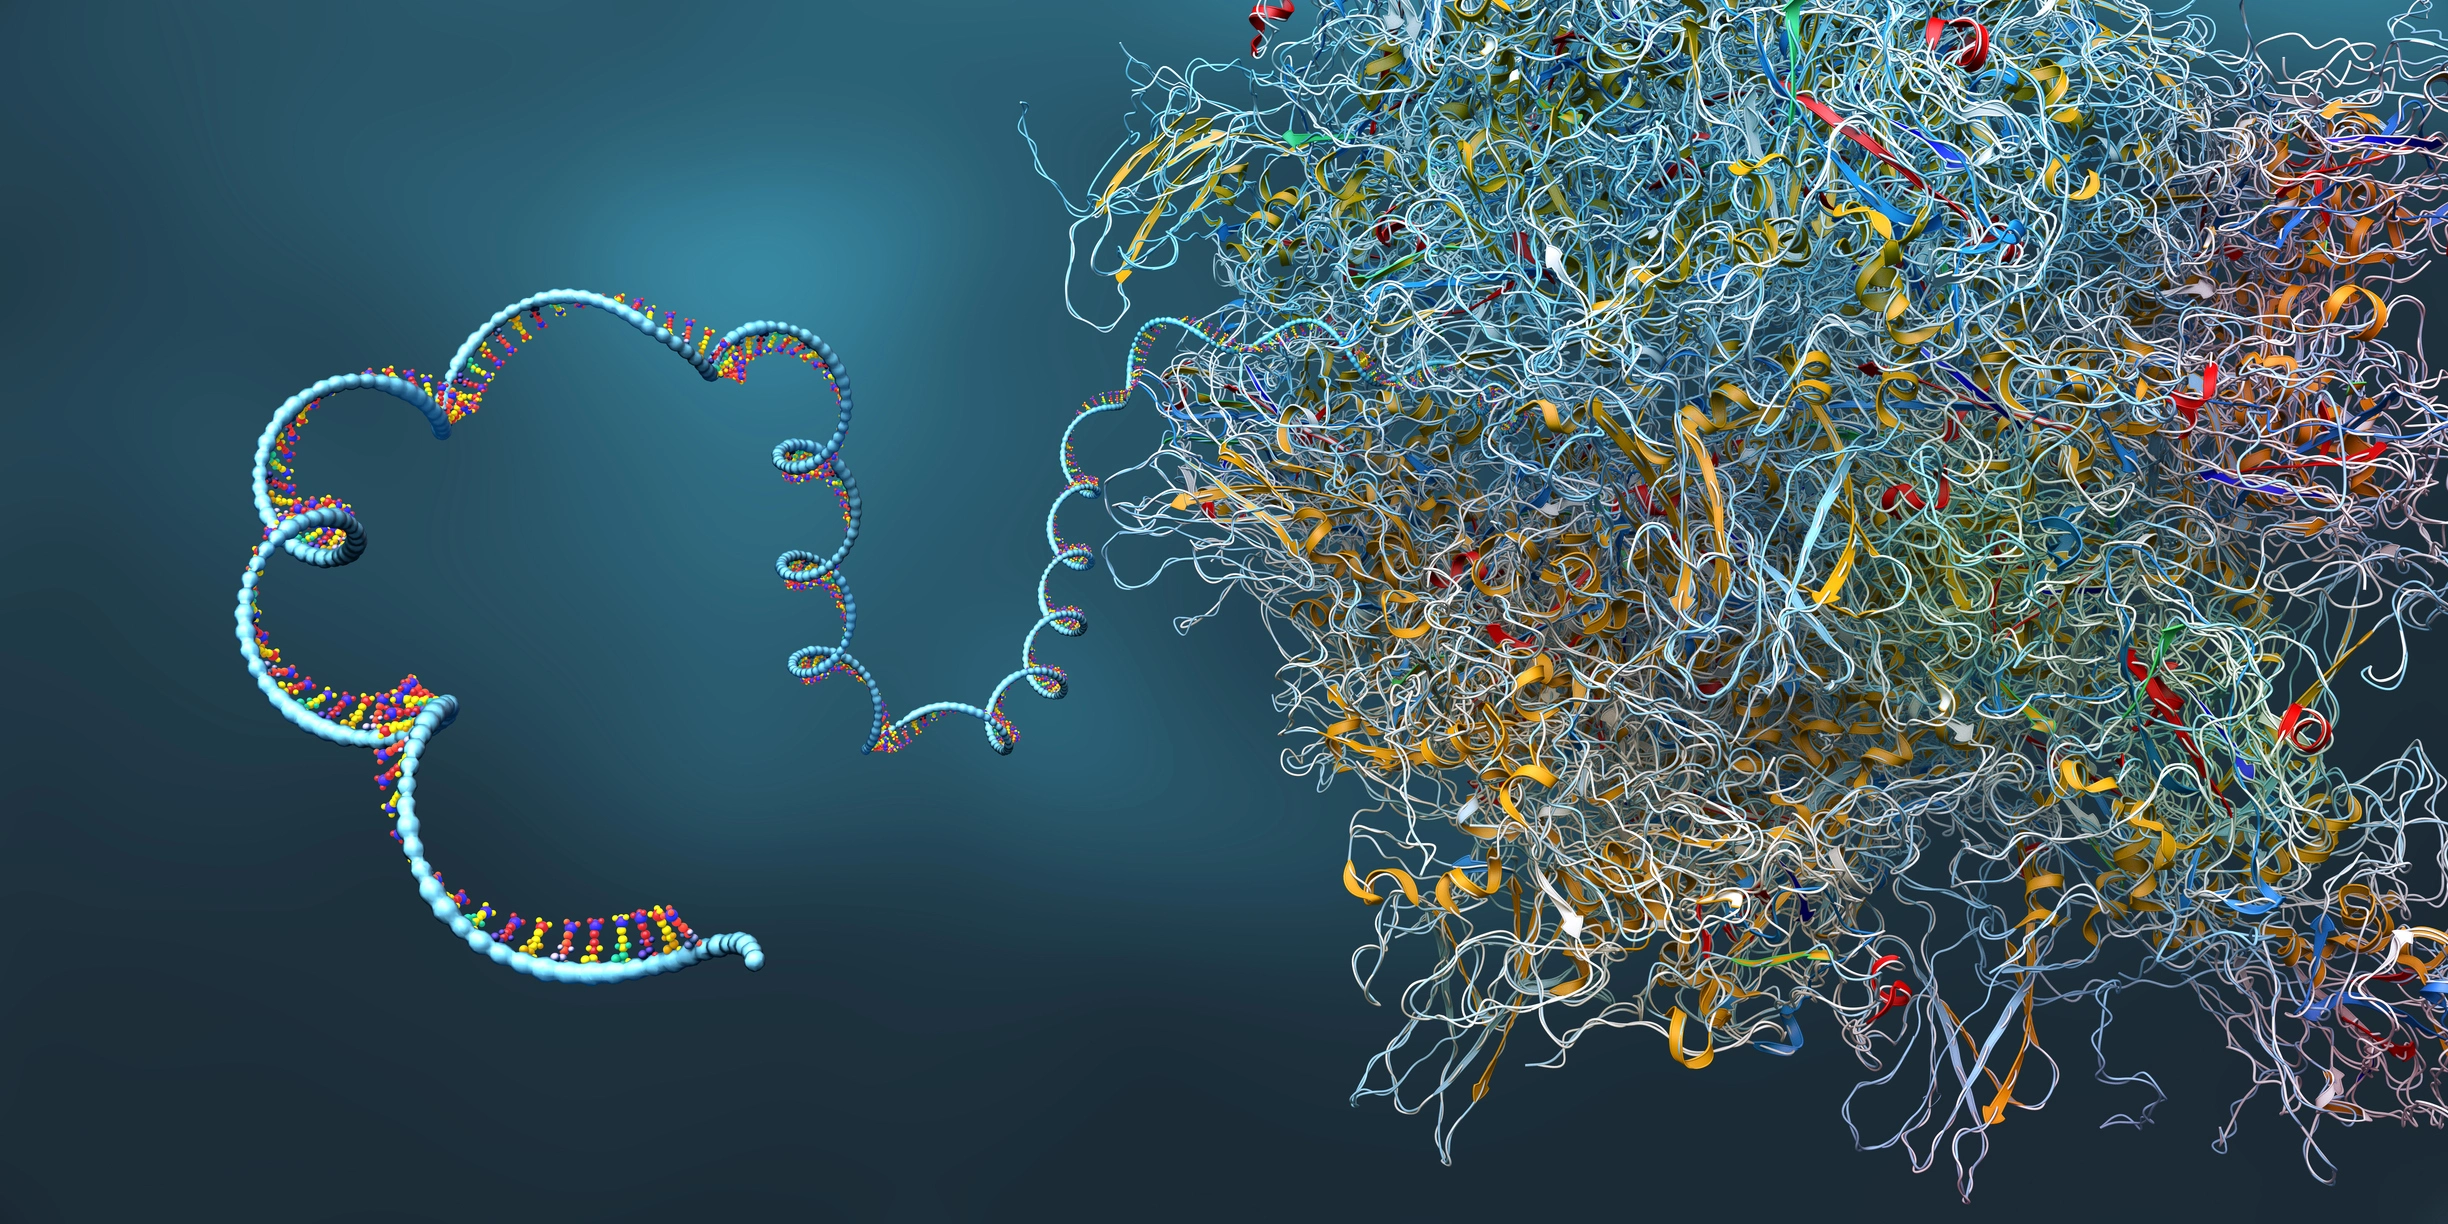
The gene-to-protein workflow represents one of molecular biology’s most fundamental processes, allowing scientists to express and study proteins of interest. This comprehensive guide details each step from initial DNA sequence to purified protein, highlighting critical decision points and technical considerations.
By following this workflow, researchers can successfully clone genes, construct expression vectors, and produce functional proteins for various applications including structural studies, enzymatic assays, and therapeutic development.
The following diagram provides an overview of the key steps in the gene-to-protein workflow, which will be detailed in the subsequent sections:
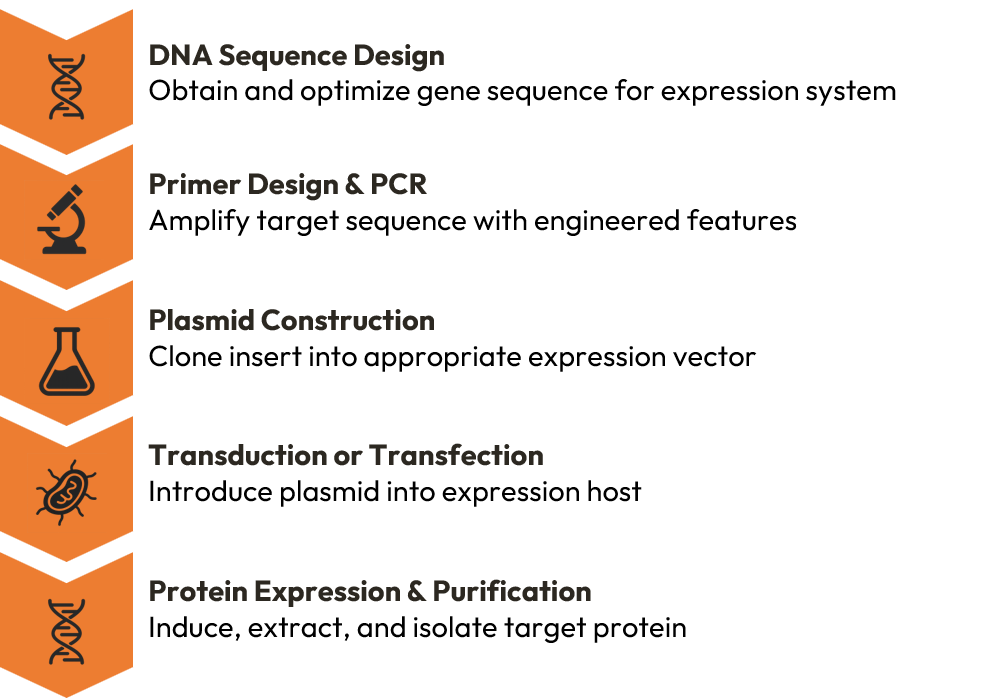
Starting Material: DNA Sequence
The journey begins with obtaining the coding sequence of interest. This can be sourced from genomic DNA, complementary DNA (cDNA) libraries, or public databases like NCBI GenBank. Before proceeding, several considerations are essential:
- Codon optimization: Different organisms prefer different codons for the same amino acid. Optimizing codons for your expression host (E. coli, yeast, insect, or mammalian cells) can dramatically improve expression levels.
- Sequence modifications: Consider adding purification tags (His6, FLAG, GST), fluorescent markers (GFP, mCherry), or stabilizing fusion partners.
- Removal of problematic sequences: Eliminate internal restriction sites that might interfere with cloning, cryptic splice sites, or repetitive sequences.
Primer Design: The Gateway to Amplification
Primers serve as the starting point for PCR amplification. Well-designed primers are critical for successful cloning:
- Core properties: Design primers 18-25 base pairs long with 40-60% GC content and melting temperatures (Tm) between 55-65°C.
- Engineered features: Add restriction enzyme recognition sites at 5′ ends with 3-6 extra bases for efficient cutting. Include start/stop codons, affinity tags, or protease cleavage sites as needed.
- Validation tools: Use software like NEBuilder, Primer3, or IDT’s OligoAnalyzer to check for hairpins, primer dimers, and off-target binding.
PCR Primer Design Best Practices: Keep at least 15 bp of exact sequence complementarity to your template, ensure forward and reverse primers have Tm within 2°C of each other, and avoid complementarity at 3′ ends to prevent primer dimers.
PCR Amplification: Generating Your Insert
Polymerase Chain Reaction (PCR) exponentially amplifies your target sequence:
- Enzyme selection: Use high-fidelity DNA polymerases (Phusion, Q5, or Pfu Ultra) to minimize errors, especially for longer sequences.
- Optimization: Adjust annealing temperatures, Mg²⁺ concentration, and cycle numbers based on template complexity and primer design.
- Verification: Run products on agarose gel to confirm correct size and specificity.
- Purification: Use gel extraction for multiple bands or PCR cleanup kits for single bands to remove enzymes, primers, and salts.
Plasmid Vector Construction: The Expression Blueprint
The choice of vector depends on your experimental goals:
Vector Selection Criteria
- Host compatibility (bacterial, yeast, insect, mammalian)
- Promoter strength and inducibility (T7, CMV, TET)
- Selection markers (ampicillin, kanamycin, neomycin resistance)
- Copy number (high vs. low)
- Fusion tags location (N-terminal, C-terminal)
Effective Cloning Methods
- Restriction-ligation: Traditional approach using compatible restriction sites
- Gibson Assembly: Seamless assembly of multiple fragments with overlapping ends
- Golden Gate: Type IIS restriction enzymes for scarless cloning
- Gateway: Site-specific recombination for easy transfer between vectors
After constructing your plasmid, verification is crucial. Sequence the entire insert and junctions to ensure no mutations were introduced during PCR or cloning steps.
Transduction vs Transfection: Protein Purification
Essential Steps for Functional Protein
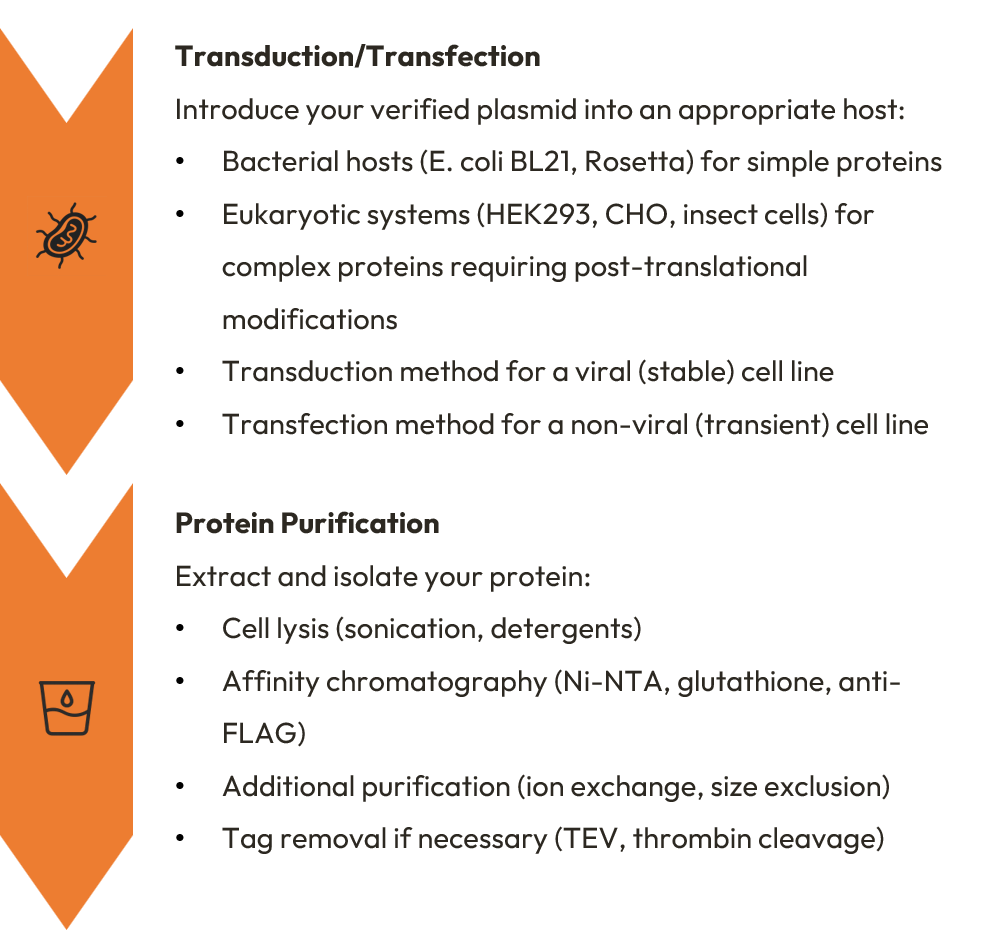
Protein Expression Optimization
- Induction Parameters: IPTG concentration for bacteria, doxycycline for mammalian
- Growth Temperature: Lower temperatures often improve solubility
- Expression Duration: Balance between yield and aggregation
Quality Assessment
- Purity: SDS-PAGE, mass spectrometry
- Identity: Western blot, N-terminal sequencing
- Functionality: Activity assays, binding studies
This workflow provides a robust foundation for protein production while offering flexibility at each step to accommodate diverse experimental needs.
The Molecular Biology toolkit in the Sapio ELN can help you create a gene to protein workflow thanks to its range of scientific tools, including Golden Gate and Gibson Assembly.